 info@novisign.com
 +972 (9) 794-7643
 (646) 893-7770
This post will show you step-by-step of how to setup and enroll your Chromeboxes to be managed devices under the Google device management console. It will also show you how to easily put your device in kiosk mode using the device management console. For those of you who do not know: “Kiosk” mode, in this context, means that the Chromebox will be dedicated for running a single app. It can run 24/7 and when it boots (in case of after electricity power failure), it will bypass the login step and go directly into the app. This is essential in Chromebox digital signage. If you wish to install the Chromebox directly, without the Device Management, you can use the installation manual of the Chromebox player app, but this way it will be difficult to apply the Kiosk mode on a non managed Chromebox. Actually, you can apply this post on any Chrome OS based device and not only on Chromebox. That means: Chromebook, Chromebase and now Chromebit has just joined this list (so this is applicable for Chromebit kiosk mode as well).
Get a Chrome device license
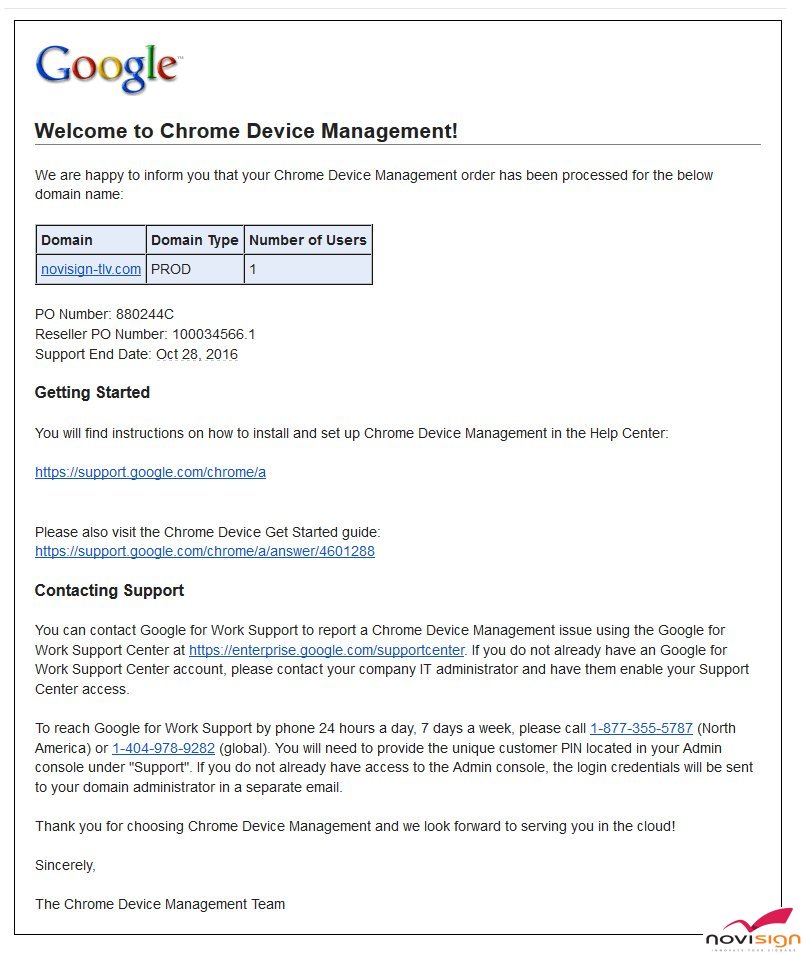
Before we start, in order to manage your Chromeboxes, you must have valid licenses for that. Licenses (which are equivalent for “users”) can be purchased only from Google resellers and not directly from Google. In case you bought your Chromeboxes directly from Google, you already have the licenses and you’ll just need to ask Google to assign those licenses to your domain (but I doubt that this is the case; more likely that you didn’t purchase your Chromeboxes from Google). You can inquire Google for a local reseller for purchasing licenses in this link. When you purchase the license, you need to tell the reseller to which domain exactly would you like to assign those licenses (i.e. www.mydomain.com). After a couple of days, you’re supposed to get an email like the example you see here, telling you that you got the licenses.
Set the Chrome Device Management Console |
|
| 1) After you got the Chrome device management licenses, you need to log in to the device management console of Google. You can surf to admin.google.com or through your gmail account, you can click the matrix icon in the top right corner, then click the “More” link in the popup icon menu and then click the “Admin” icon. The email which you log in with should have administrator privileges of the domain. | 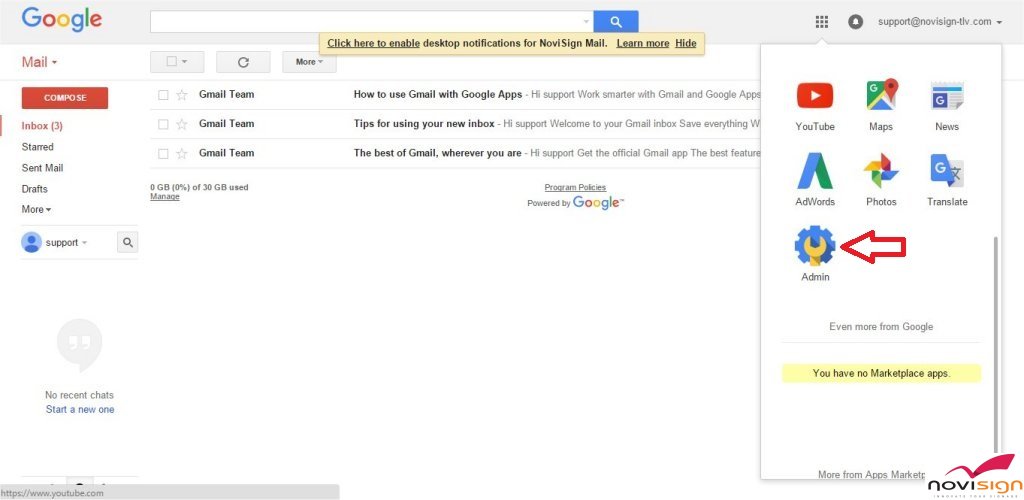 |
| 2) Once you’re inside the Device Management Console of your domain (now, I was wondering what would happen if you didn’t register this domain through Google, but let’s hope this is not an issue), you’ll see how many active users you have (in the right pane) and the main part of the screen has a bunch of icons. Click the “Device management” icon. | 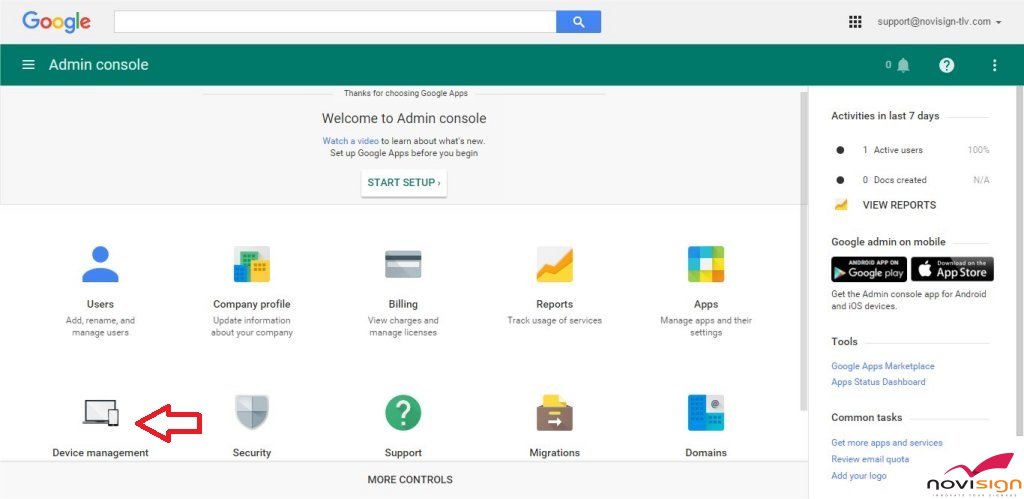 |
| 3) Once you’re inside the device management module, you will see, in the top right corner, how many licenses you have and how many are being used (i.e. “Licenses used: 0/1). Also, you’ll see that no devices are defined. If you like, you can create an organization tree of your company/business, in the left pane. | 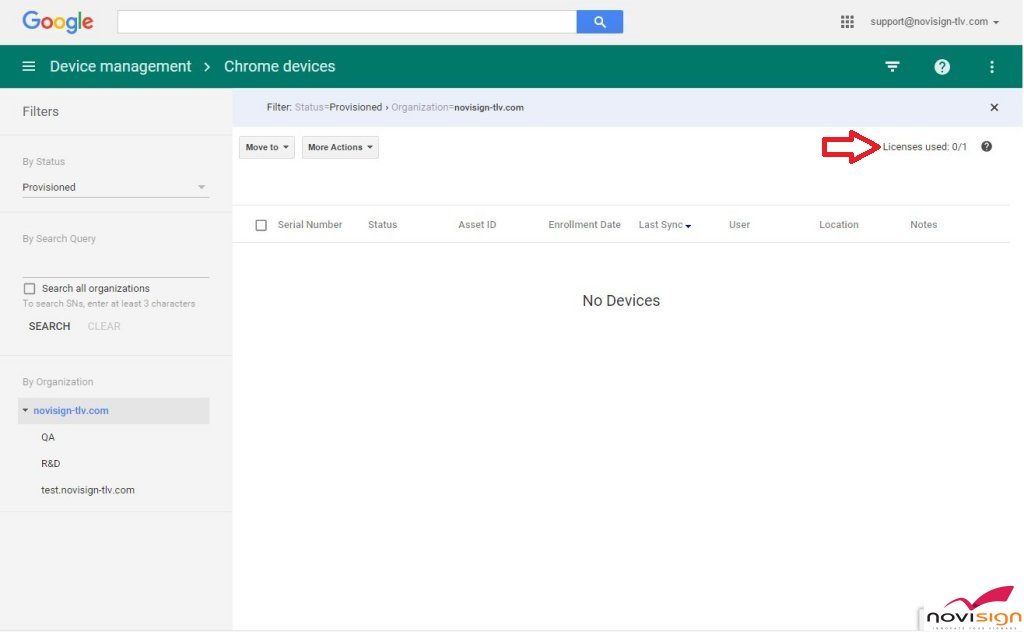 |
Power and connect your Chromebox |
|
| 4) Now, it is time to deal with your Chromebox (Chromeboxes come in several brands by Google partners: it can be AOpen, Asus, Acer, Dell or HP). You need to turn it on. Since this is the first time it starts, you will need to select 3 things: network, language and keyboard. Once you are done, click the “Continue” button and then click “Accept and continue”. Then, you will get a login screen. Instead of regular login, you would like to enroll this Chromebox into the device management. To do so, click the Ctrl + Alt + E. | 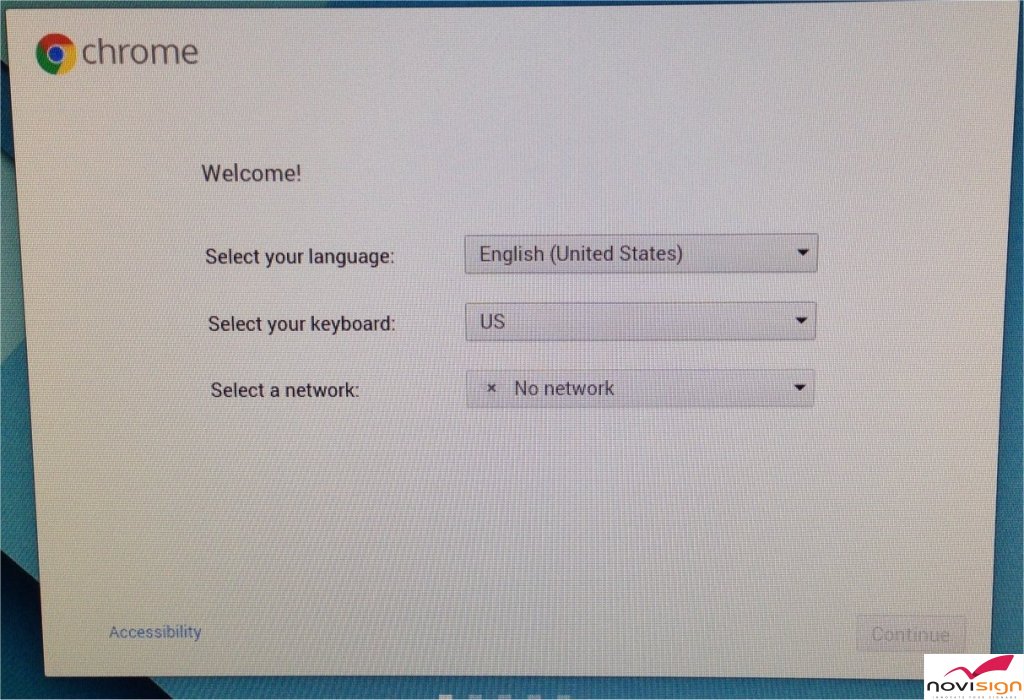 |
| 5) The login screen will be replaced with another screen: “Enterprise Enrollment”, for allowing you to set the Chromebox enterprise enrollment. There you should type the user (email address) from your managed domain, its password and go next. | 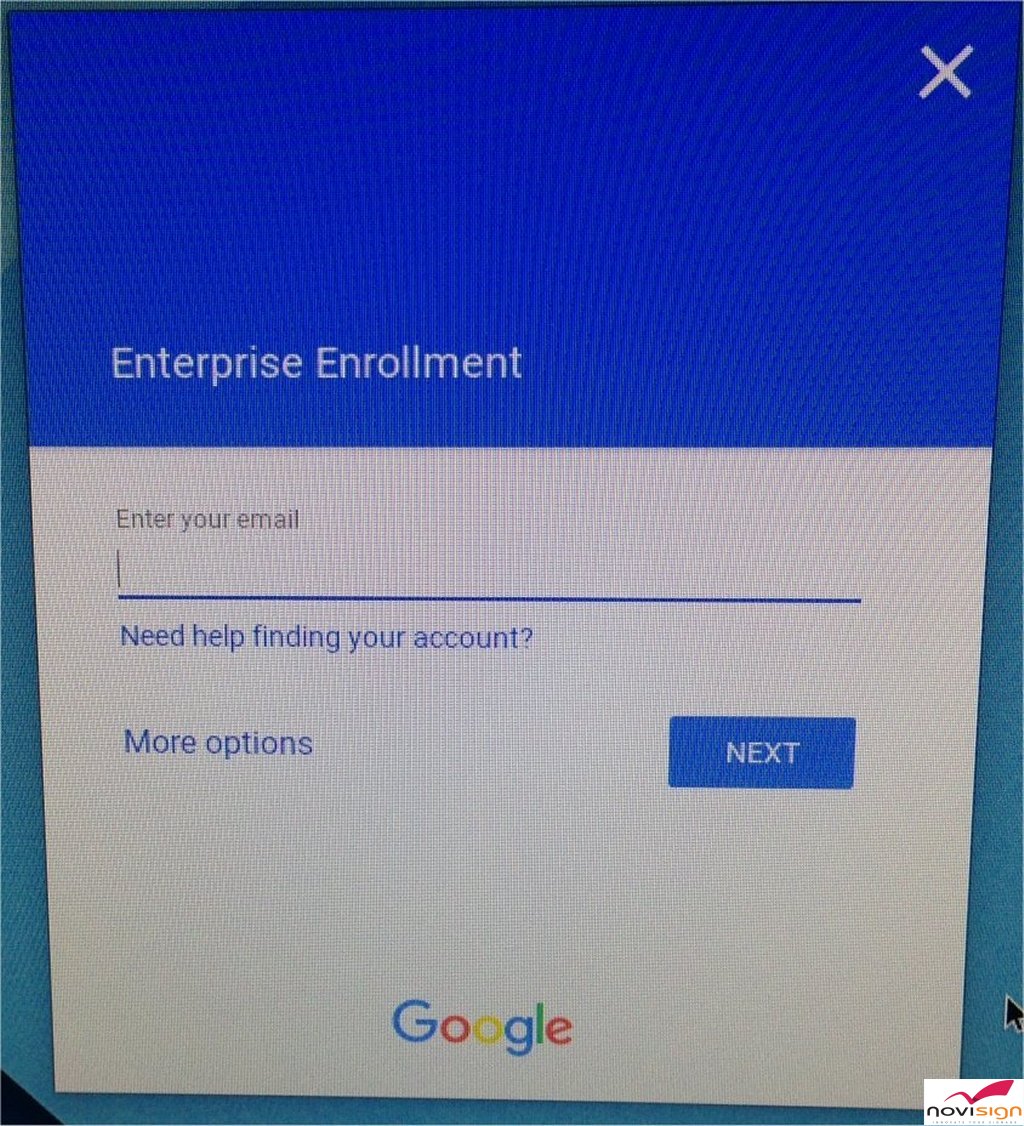 |
| 6) You should get a message telling you that “Your device has successfully been enrolled for enterprise management.”. Press the “Done” button. | 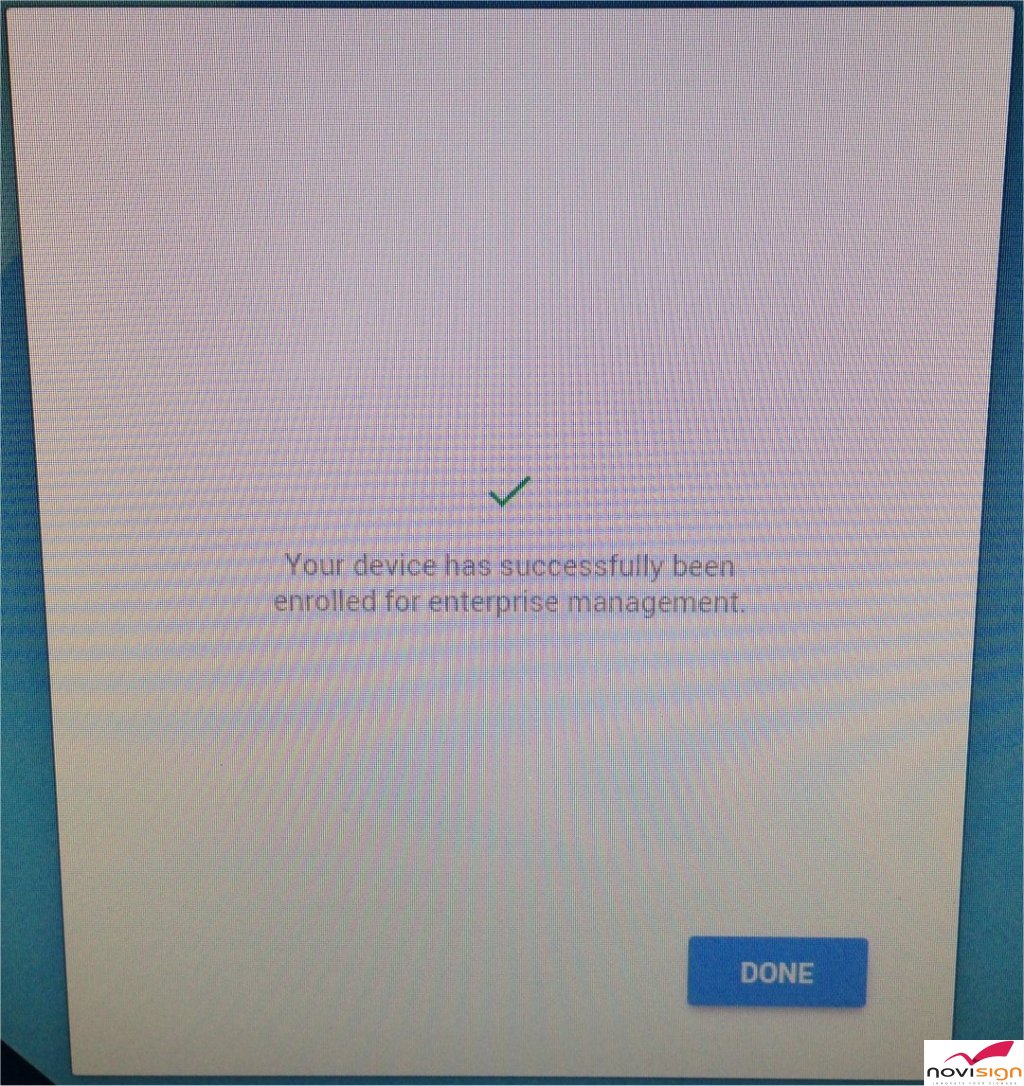 |
| 7) Now, if you reboot your Chromebox, after startup, the login screen will have the following title: “Sign in to your Chromebox; Managed by “. That means, you did it. Your Chromebox is now managed by Google Device management Console. | 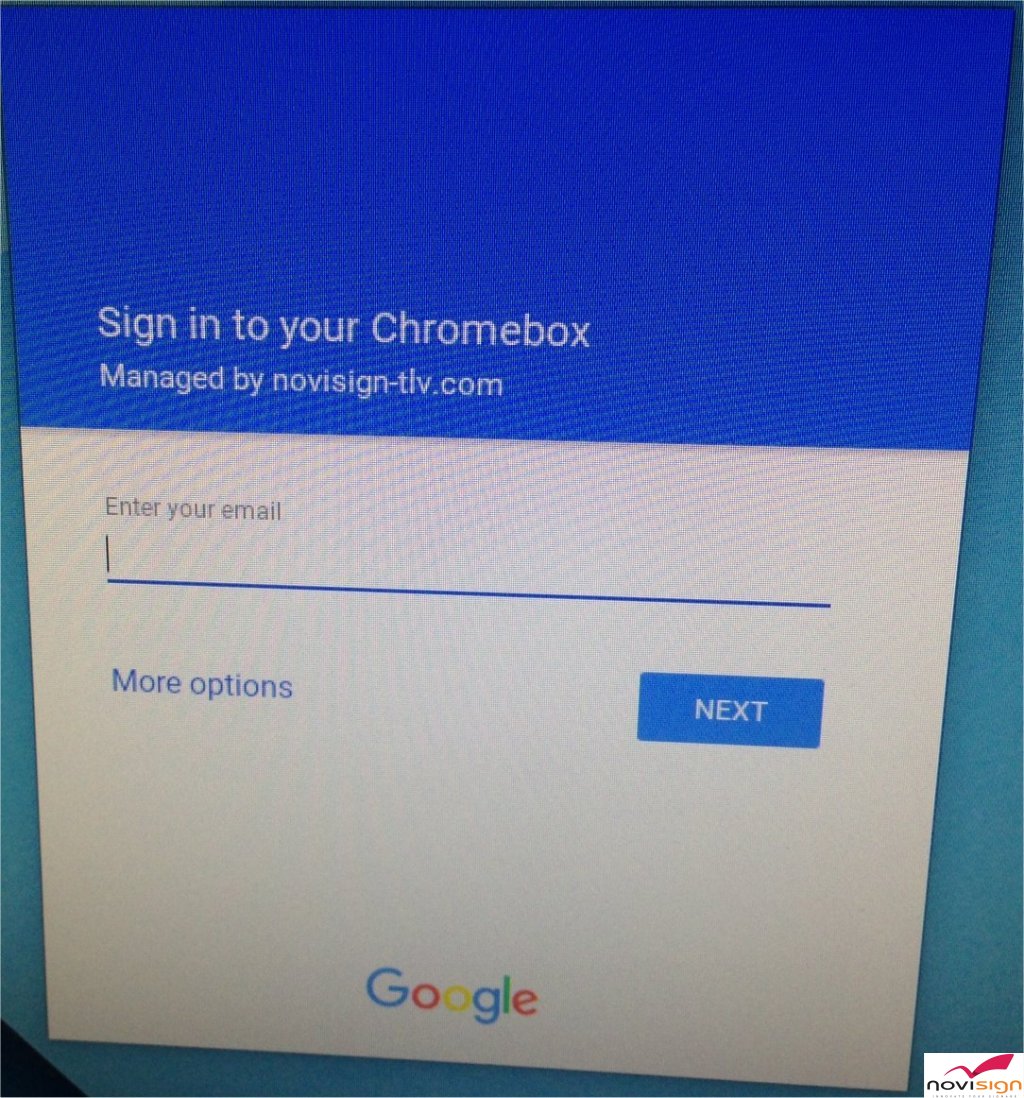 |
Verify that your Chromebox was added to the Device Management |
|
| 8) Get back to your PC to the device management (in order to refresh it, not sure if you need to log out and the log in or just refresh the page). There you should see under the “Chrome devices” your managed Chromebox. Its status is “Provisioned”, since you used a user with a enough licenses on that Chromebox. | 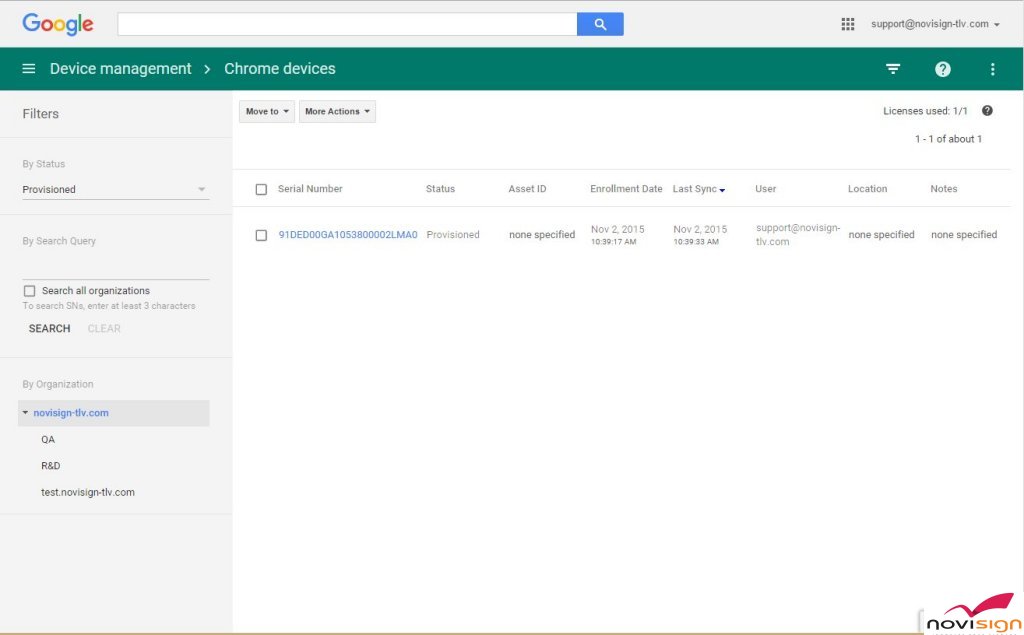 |
Configure the Device settings of the Chromebox |
|
| 9) Click the menu in the top right corner (looks like 3 vertical dots. See the screen shot to the right) and a menu will be opened. Choose the “Chrome device settings”. This will bring you to the following path: Device management -> Chrome management -> Device settings. |  |
Entering the Kiosk mode |
|
| 10) This is the place where you need to define the settings for all your Chromeboxes which were enrolled to this domain. One of the reasons we’re here is to put your Chromebox in Kiosk mode, so it will be dedicated only for running a single app: NoviSign digital signage app (or other app if you like). To do that, you need to scroll down the settings page till you reach the settings which deal with Kiosk. One of them is called “Kiosk Apps” and has a link nearby: “Manage Kiosk Applications”. Click that link and you’ll be taken to the Kiosk Apps page. | 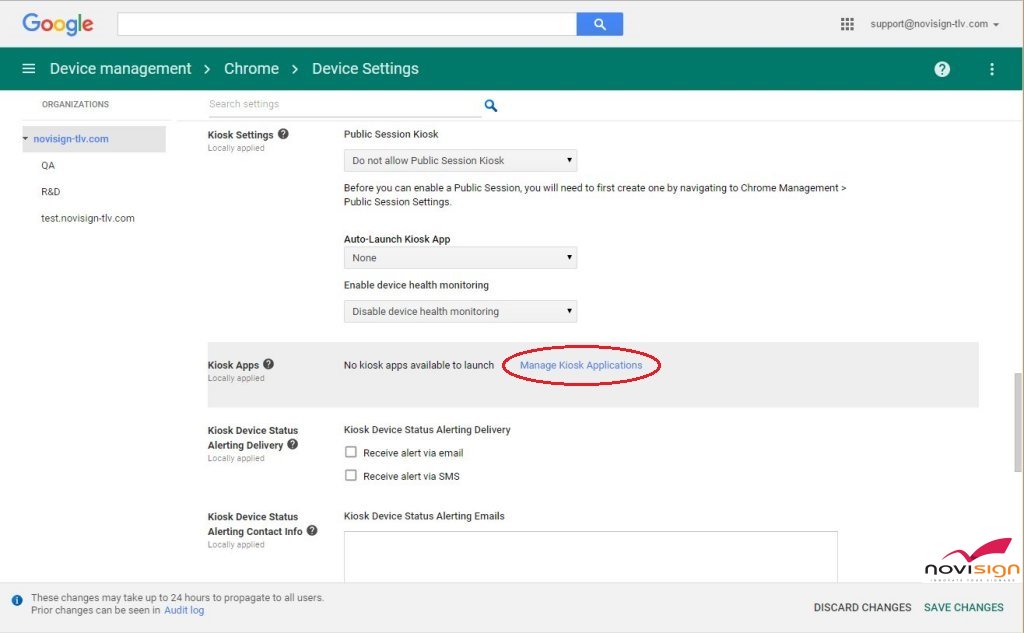 |
Get the NoviSign digital signage app |
|
| 11) In the Kiosk Apps page, you need to find the app you wish to choose. In our case, it is our digital signage app under the Chrome Web Store. Hence, click the “Chrome Web Store” button and type: digital signage chromebox. NoviSign’s digital signage app for Chromebox should appear there. | 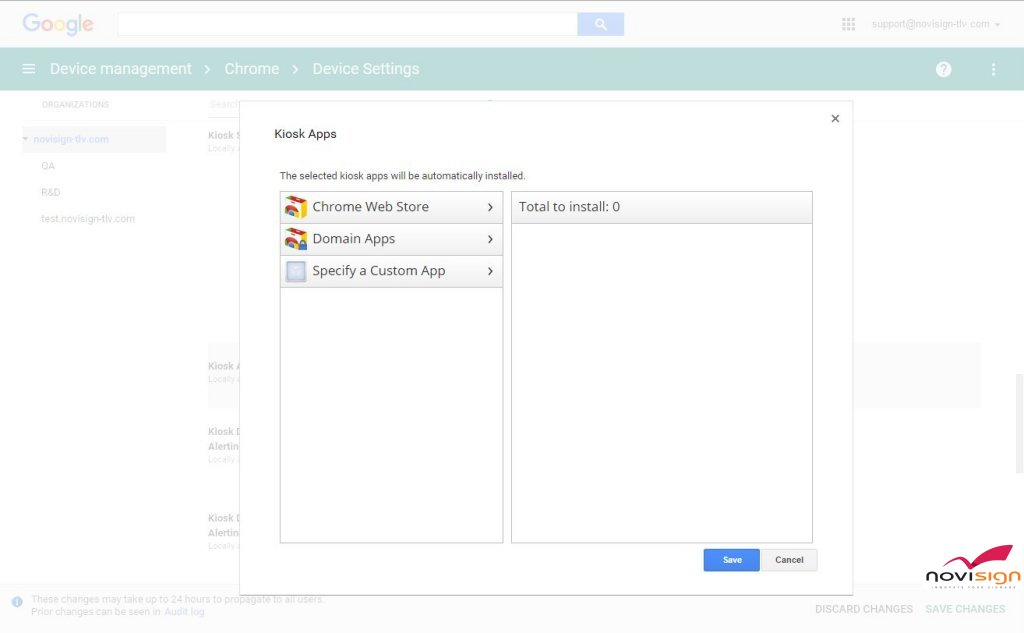 |
| 12) Choose the digital signage player app. You can click the “Details” link and it will open a tab with a description of the app in the store. Click the “Add”, in order to choose it. It will be added to the right pane and the “Add” link will be changed to “Added”. Click the “Save” button below. | 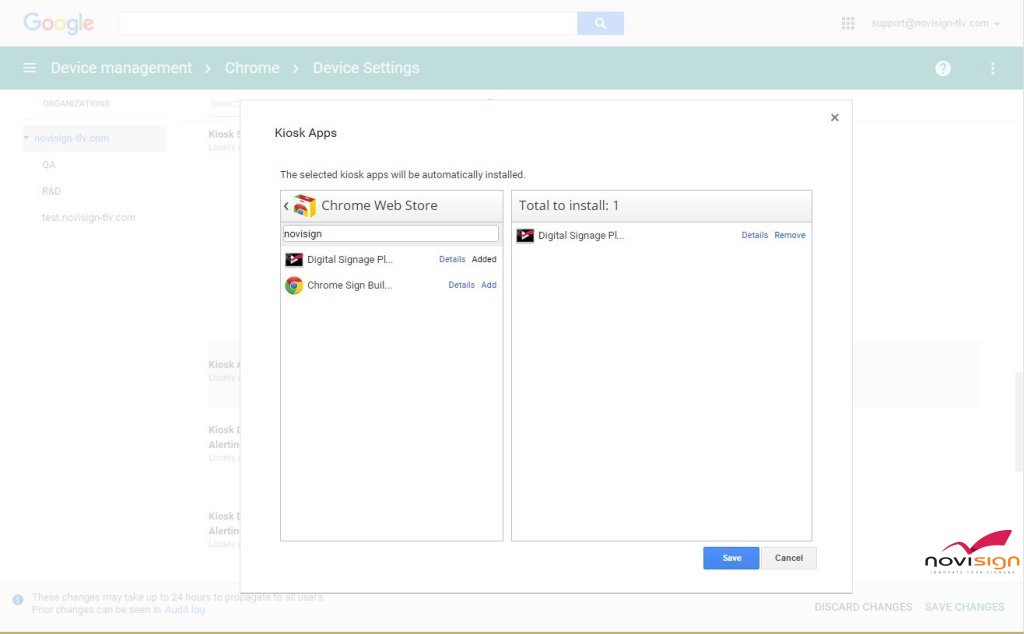 |
| 13) You’re back in the Chrome device settings page. You can alter other settings of the Chromebox / kiosk mode, such as preventing it from going into sleep mode (especially in a case of digital signage app that needs to run 24/7) and much more. Once you’re done, don’t forget to press the “Save Changes” button in the bottom right corner. | 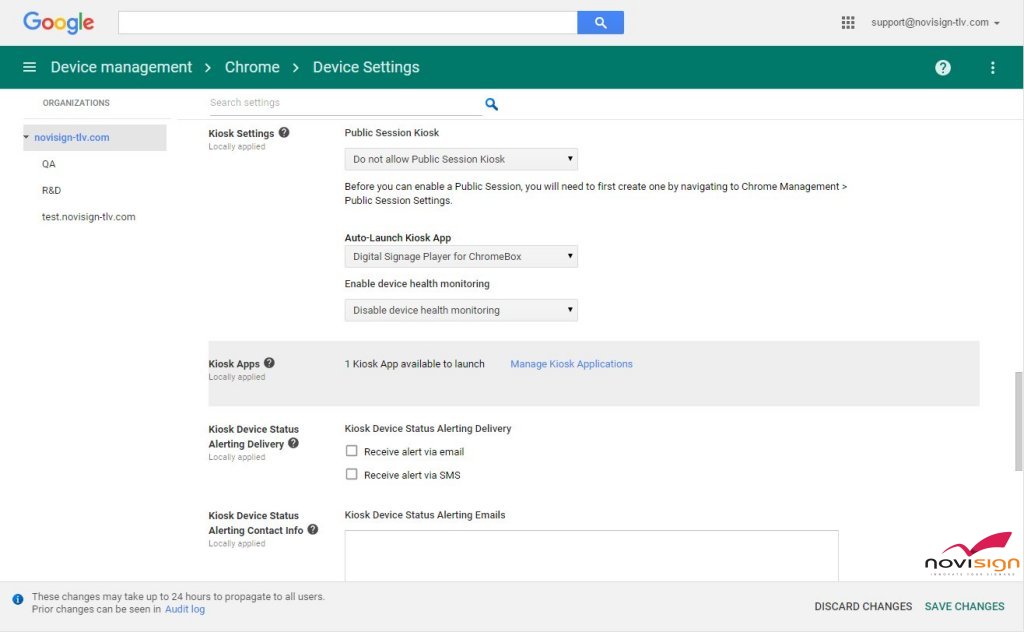 |
Start using the device and enroll more Chrome OS devices |
|
| 14) Now the Device management shows you that you have one managed Chrome device. You can reboot or log in to the Chromebox and it will apply on itself the settings which you’ve just made in the console. If you set it to Kiosk mode, it will enter the app just right after the boot (that means it will omit the login). Please notice, that in the first time it will take longer as it will download the dedicated app which you previously selected. Well done!Attention: To prevent the Google “Cryptohome” bug (the device might “forget” the app’s settings), let the app start running the playlist on the Chromebox, then turn off the Chromebox, using the on/off button, count 10 seconds and then turn it back on. If you’ve been using this procedure for setting an Asus Chromebit rather than a Chromebox, you can reboot it (as it doesn’t have an on/off button) using the Device Management Console where you have a “Reboot” button there. | 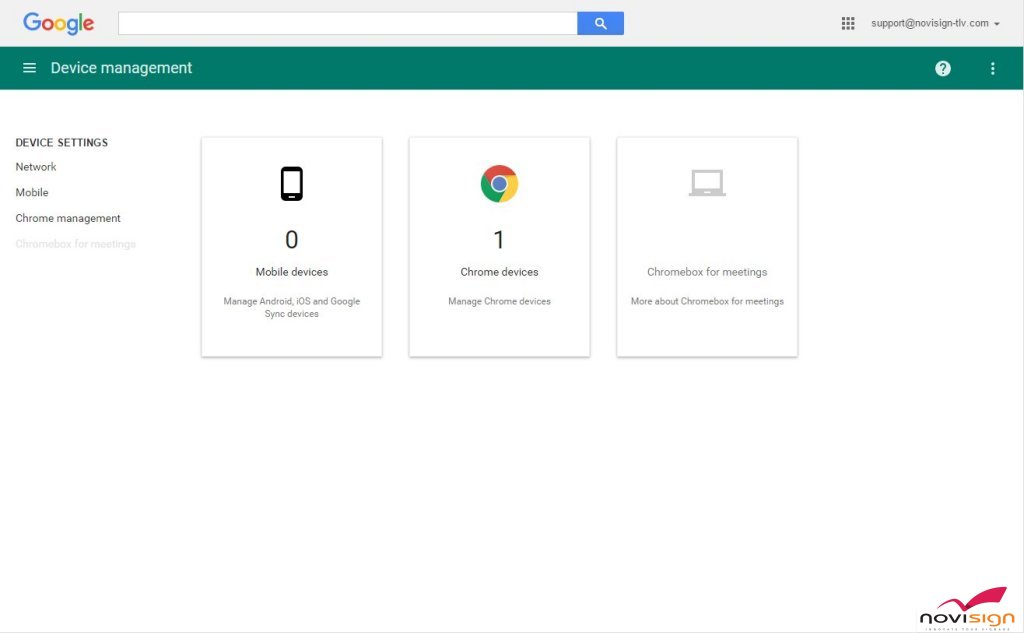 |
Share |
Tweet |