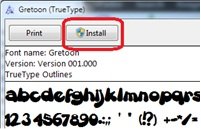
1) In case you do not have the font you want to use on the PC where you use the web editor, Install it on that PC: Open the ttf file and click the “Install” button.
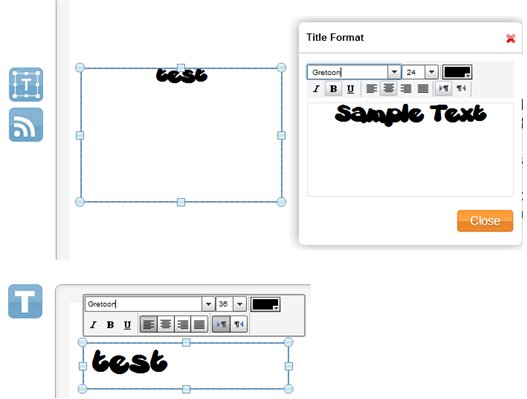
2) In the web editor, instead of selecting a predefined font from the list, just type the name in the font family box and press the Enter key (in the text editor, select the text before that).
3) Installing the font on the Android player:
First send the ttf font file from your PC to the email address you defined on the Android device (or find another way to copy it there).
Option A: On a non-rooted device. This option requires NoviSign player v2.0.54 or greater.
a. Rename the ttf font file name to be exactly the same as the family name typed in the editor (keep the ttf extension).
b. Download the renamed font to the device, place it in the existing player cache folder under a folder named “font” (you can use an application named “File Manager” from Google Play in order to transfer the file from one location to another and to create the new folder):
/mnt/sdcard/Android/data/com.novisign.**/files/**Player/cache/font
or
mnt/sdcard/Android/data/com.onsignage.**/files/**Player/cache/font
where ** values depend on the player brand (usually there will be only one such path, so it is easy to find). The font folder may not exist for first time, but the cache folder should already be there.
c. If a playlist was already playing, go back and start again to allow it loading the font.
Option B: On a rooted device you can simply install it as a system font. For example, download the ttf with the browser and install it with the Font Installer (found in play store). However, on non-rooted devices, you can’t add a font to the Android.
Please notice: no matter which option you choose, you MUST reboot the Android device, after you have copied the font file to the proper location.


