This post will explain you how to upgrade your NoviSign Android digital signage app (actually, as well as any other app) from remote.
Sometimes the auto-update feature of the Google Play store app doesn’t work on your Android device and will not auto update the NoviSign app when there is a new version in the market, even if you set it to “Auto-update apps over Wi-Fi only”. That’s why we bring you the following procedure.
The first thing you need to know is that in order to upgrade the app using the following procedure, it doesn’t matter if you set the Google Play app to auto update or not, it doesn’t matter if you turned on the location access of the device or not, it also doesn’t matter if the app is down, up or running a playlist. The only thing that matters is that you have set a gmail account on that Android device – same gmail account which you can access from your PC (or Macbook). For making things easy, we advise not to set more than 30 – 40 players with the same gmail account. Here is a link to a video of how to update your NoviSign Android digital signage app.
In order to upgrade the app on a remote Android device, do the following:
- Open a Chrome browser window on your PC (or Macbook).
- Sign in to the same gmail account (www.gmail.com) that is defined on the remote device.
- After you’re inside the gmail account, change the page URL to play.google.com, in order to surf to the Google Play market.
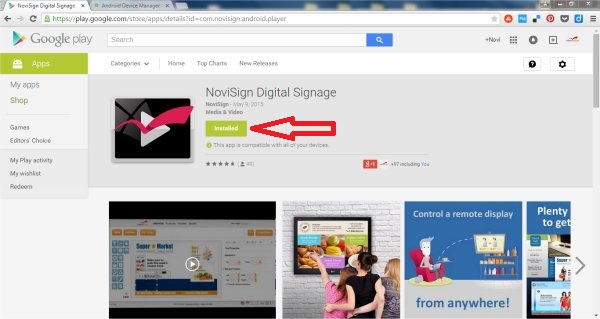
- Now, search for novisign. When you get the search results, click the NoviSign app with the black background icon (this is the native Android app).
- You’ll see a green button under the app name with the label “Installed”. That means that the NoviSign app is installed on at least one device with this gmail account.
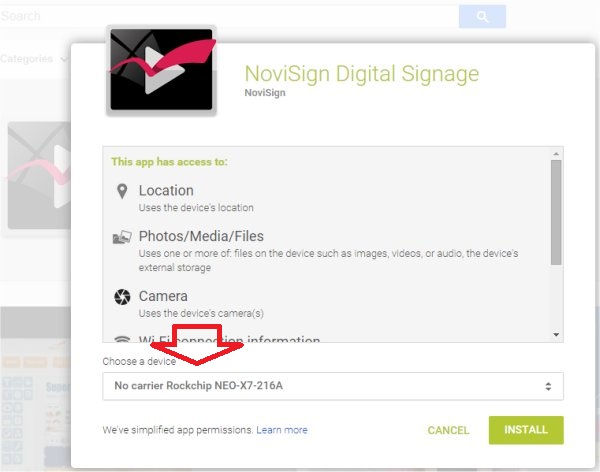
- Click the “Installed” green button and a new popup window will be opened. In the bottom of the window, you’ll see “Choose a device” and a dropdown list. The dropdown list holds all the devices which were installed with the NoviSign app (installed directly from the market and not from an APK!) under that gmail account.
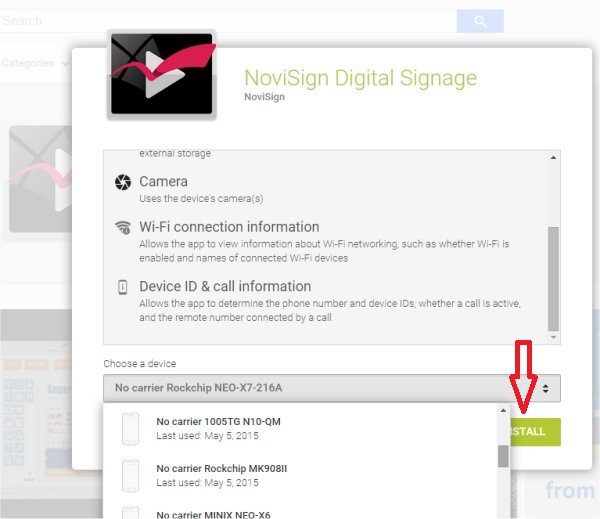
- Click the dropdown list and choose the Android device which you like to upgrade its NoviSign app. Then click the “Install” button. You’ll get a notification message immediately after. That means the upgrade command was sent to the device. Even if the device is offline, once the device gets online again, it will be immediately upgraded.
- For upgrading another Android device, repeat steps 6 + 7.
Please notice that the device name is the brand and model. You might want to change the name (from something like “NEO-X7-216A”) to a more friendly and meaningful name (like “Minix X7 – Washington – Mayflower bookshop”).
How do you change the device’s name? Do the following steps (do them after step no. #3 in the above procedure):
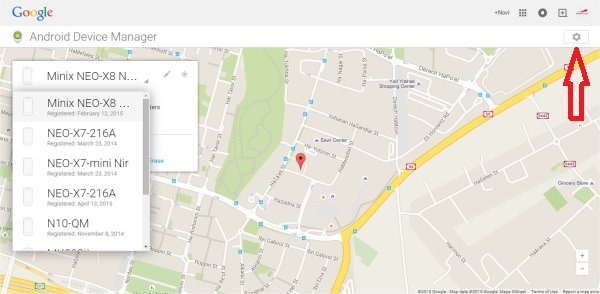
- In the Google Play market (play.google.com), click the settings gear icon in the top right corner of the page.
- In the menu, choose “Android Device Manager”.
- This will collect data from all the devices. Press the “Accept” button in case you’re asked to confirm it. Please notice that you should turn on the “Location Access” option in each Android device which you’d like to appear here (to do that, on the device itself, you need to access the Android “Settings” -> “Location Access” and turn it on).
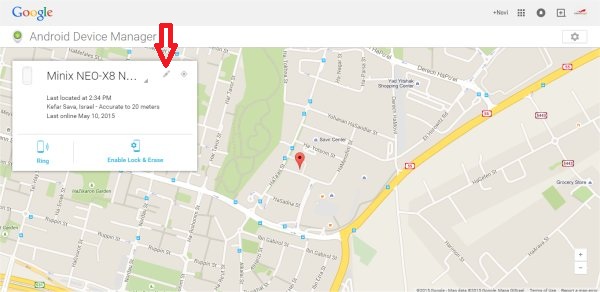
- In the list on the left you can see and choose any of your Android devices which are under this gmail account.
- Once you choose any of them, you can click the “Rename” pen icon next to it and rename it.
Good luck!
